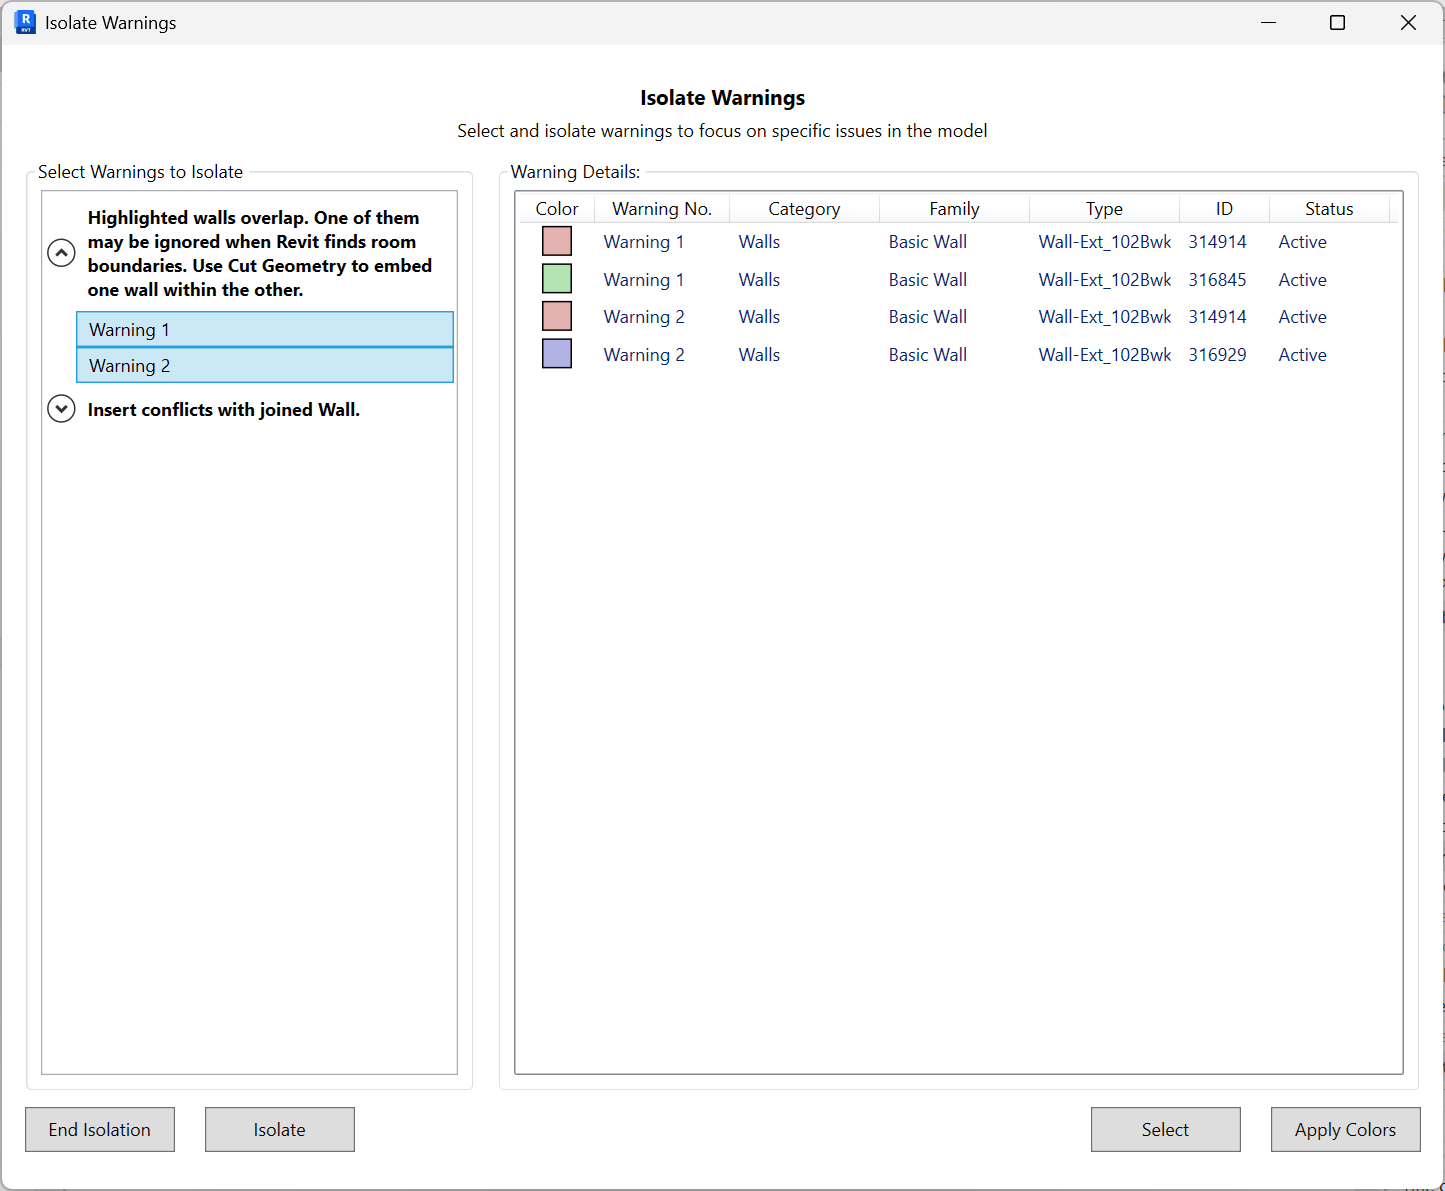
Isolate Warnings
Focus on specific Revit warnings by isolating their related elements. Pick warning groups, preview details, select/color elements, isolate to review, and restore when done.
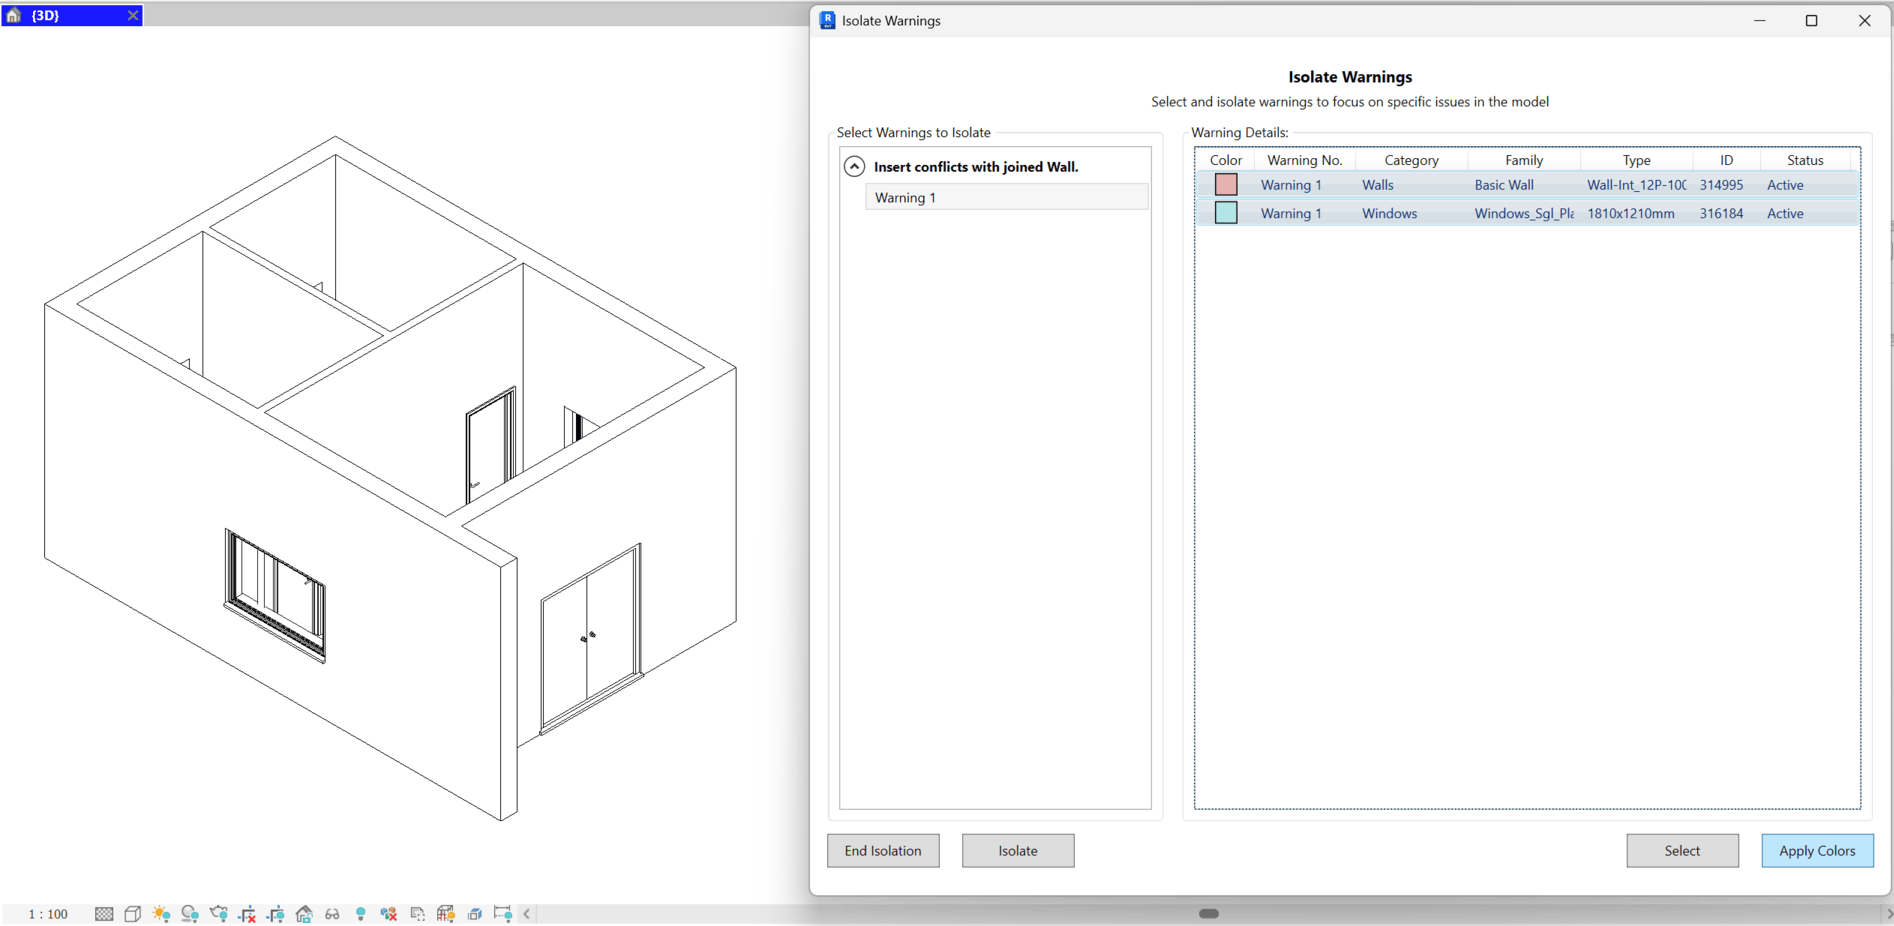
- Choose warnings. In Select Warnings to Isolate (left), expand a warning group (e.g., "Highlighted walls overlap..."). Select one or more individual warnings (e.g., Warning 1, Warning 2).
- Review details. The Warning Details grid (right) lists each item with:
- Color swatch for the element highlight
- Warning No., Category, Family, Type, ID
- Status (Active or Resolved)
- Select elements. Click Select to select the listed elements in Revit for quick navigation and inspection.
- Apply colors. Click Apply Colors to color-code the elements by their warning, helping you visually audit issues.
- Isolate. Click Isolate to temporarily isolate only the elements associated with the selected warnings in the active view.
- Interact and resolve while the tool is open. You can keep this window active and work directly in your Revit model:
- Edit or modify the selected elements (e.g., adjust geometry, fix joins, change parameters) to resolve the issue.
- As you resolve a warning, the tool updates the Status in the Warning Details grid to Resolved. If needed, use Select again to re-evaluate or Isolate to focus remaining items.
- Resolved items remain visible for traceability; you can unselect or end isolation to continue with other warnings.
- End isolation. Click End Isolation to restore the view when finished.

Click the Clear Overrides button to remove color overrides